How to Create a Payoneer Account: a Step-by-Step Guide in 2023
Contents

Financial agility isn’t an option but a necessity these days, especially if your operation area requires working with various people worldwide. Whether an entrepreneur, freelancer, or aspiring global player, knowing how to open a Payoneer account provides a gateway to flexible financial management.
The list of online money transfer services is vast and includes Payoneer, a company that has stood the test of time. It has been around for a while, evolving at unprecedented speed and being among the largest digital financial companies.
Are you looking for a payment system that offers easy global transactions, gives you total command of your finances, is tailored to your ambitions, and provides bank-level security? Payoneer system is your go-to!
Make sure to read this guide, as it provides steps on how to make a Payoneer account promptly.
Learning the intricacies of Payoneer beforehand
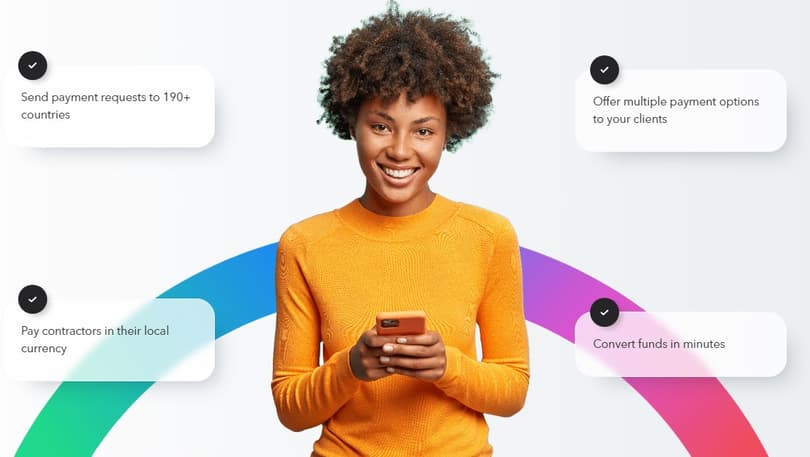
Whatever country you’re a citizen of, Payoneer is likely to have payout coverage available in that state. Most countries have two options (local currency and SWIFT) available, including but not limited to the U.S., U.K., France, Germany, Spain, Italy, Japan, Canada, Australia, Brazil, Argentina, Norway, China, and India. Still, it’s a good idea to double-check if your country falls into the system’s scope and ensure both a local currency and a SWIFT option are available. By doing so, you’ll be certain that your money moves seamlessly from Payoneer to your local bank.
Payoneer provides excellent flexibility, allowing its clients to rest assured that their finances are kept under lock and key. This unparalleled security, however, comes at a price.
If you only receive payments from other Payoneer users through the platform, it will cost you nothing. Conversely, suppose your clients neither use nor plan to open a Payoneer account, but you still want to receive a payment via the platform. In that case, you’ll need to send a payment request to your customer’s bank and pay a 3% (credit card) or 1% (ACH bank debit) fee after receiving money in your account.
Other fees include:
- 0% if a recipient has a Payoneer account (2% if otherwise)
- 2% for batch payments
- $1.50 for a transfer if the currency matches; up to 2% for withdrawals in non-local currency
- 0.5% to move funds between Payoneer balances
- $29.95 if the Payoneer account receives less than $2,000 annually
$29.95 annual Mastercard fee
- Up to 3.5% for transactions involving currency conversion
- Up to 1.8% cross-border fee transaction
- $3.15 for ATM withdrawals
- $1 for ATM balance inquiry
- $12.95 for a card replacement
Creating a Payoneer account from scratch
Assume you’ve got familiar with the fees and are ready to make a Payoneer account, watch your business flourish, and witness your entrepreneurial dreams take flight. Where do you start? Follow these steps:
#1 Starting a registration process
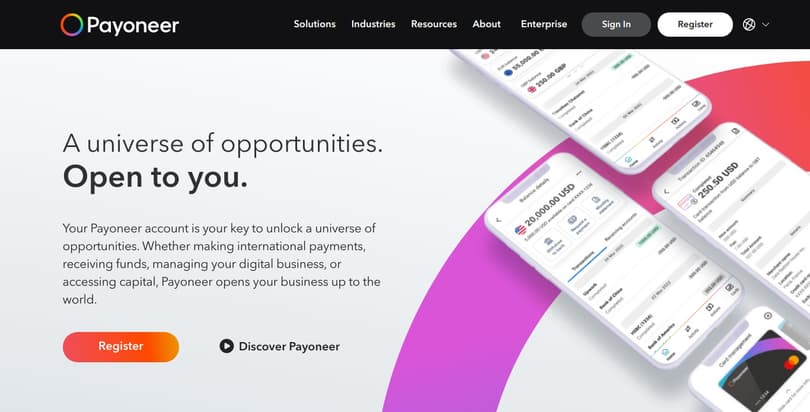
Visit the official Payoneer website. On the homepage, you will see a "sign up" or "register" button. Upon getting to the main page, click Register and proceed.
#2 Choosing the account type
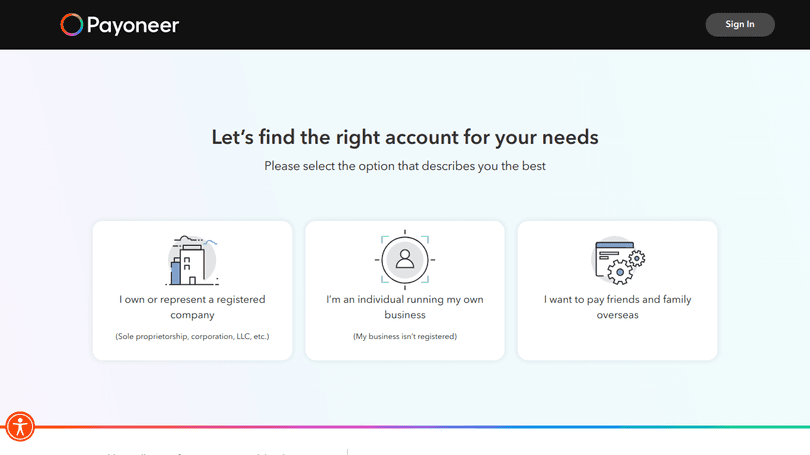
Payoneer offers 3 types of account according to your needs: "Individual," "Company," or "Bank Account Holder." Now, select the best option based on your work model. Say you’re going to freelance and receive digital payments for the job done. In that case, you need to choose the second option.
#3 Narrowing down a sign-up process
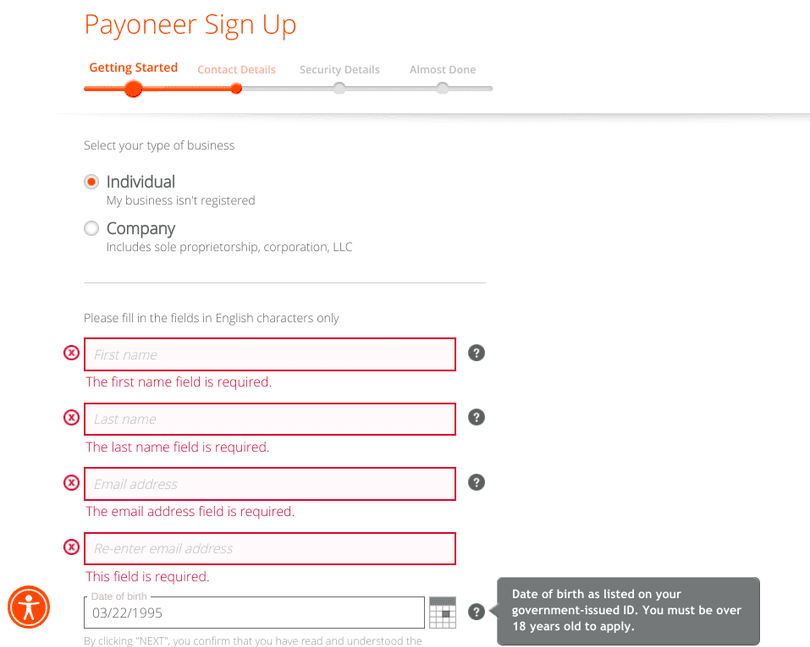
Once you pick the account type, you’ll be required to select the business type and provide personal information, including your full name, email address, date of birth, and a secure password. Ensure to fill out all the boxes correctly; first and last names must be as per your ID. Click Next to proceed.
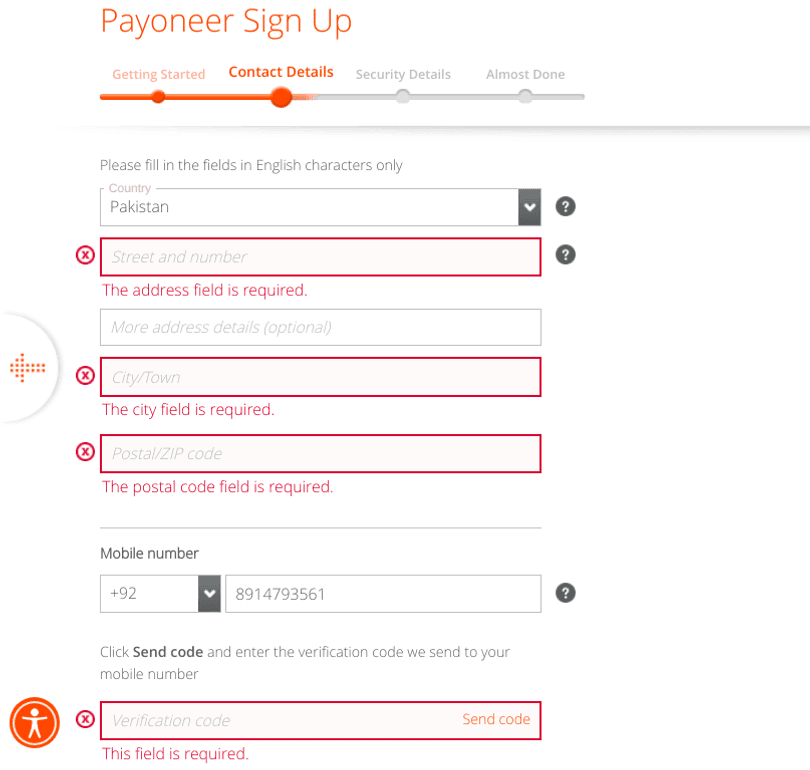
#4 Providing contact details
Now, provide information about your address as well as the phone number. Click Send code to get your number verified. Doing so will also let you move to the next step.
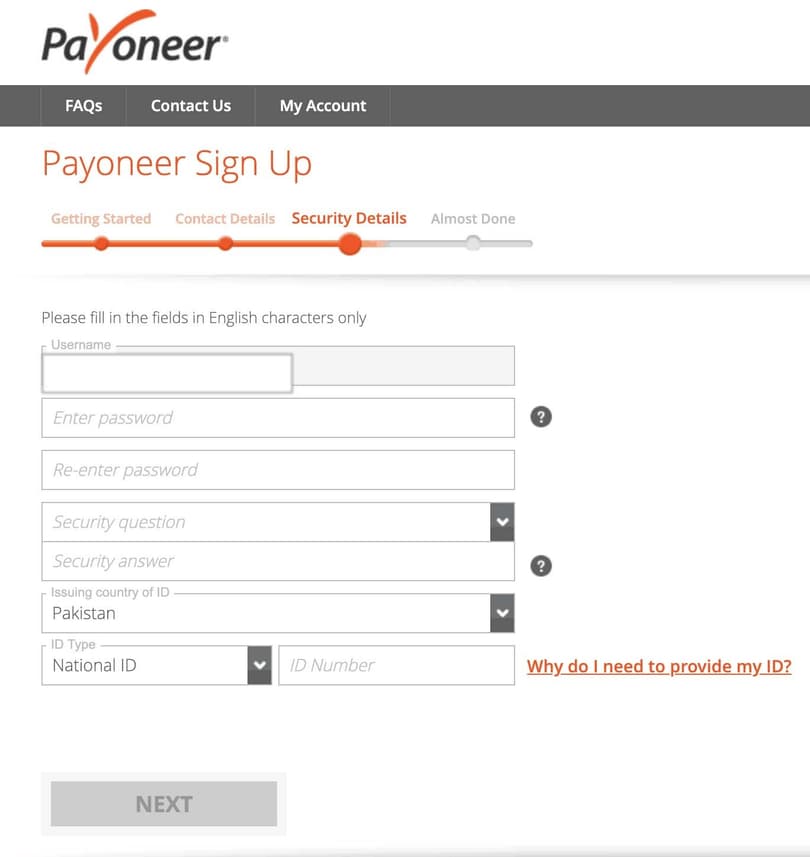
#5 Adding security and other details
Here, you must come up with a username, password, and security question/answer. Also, make sure to provide your valid ID number or any other document available in the drop-down menu. Click Next.
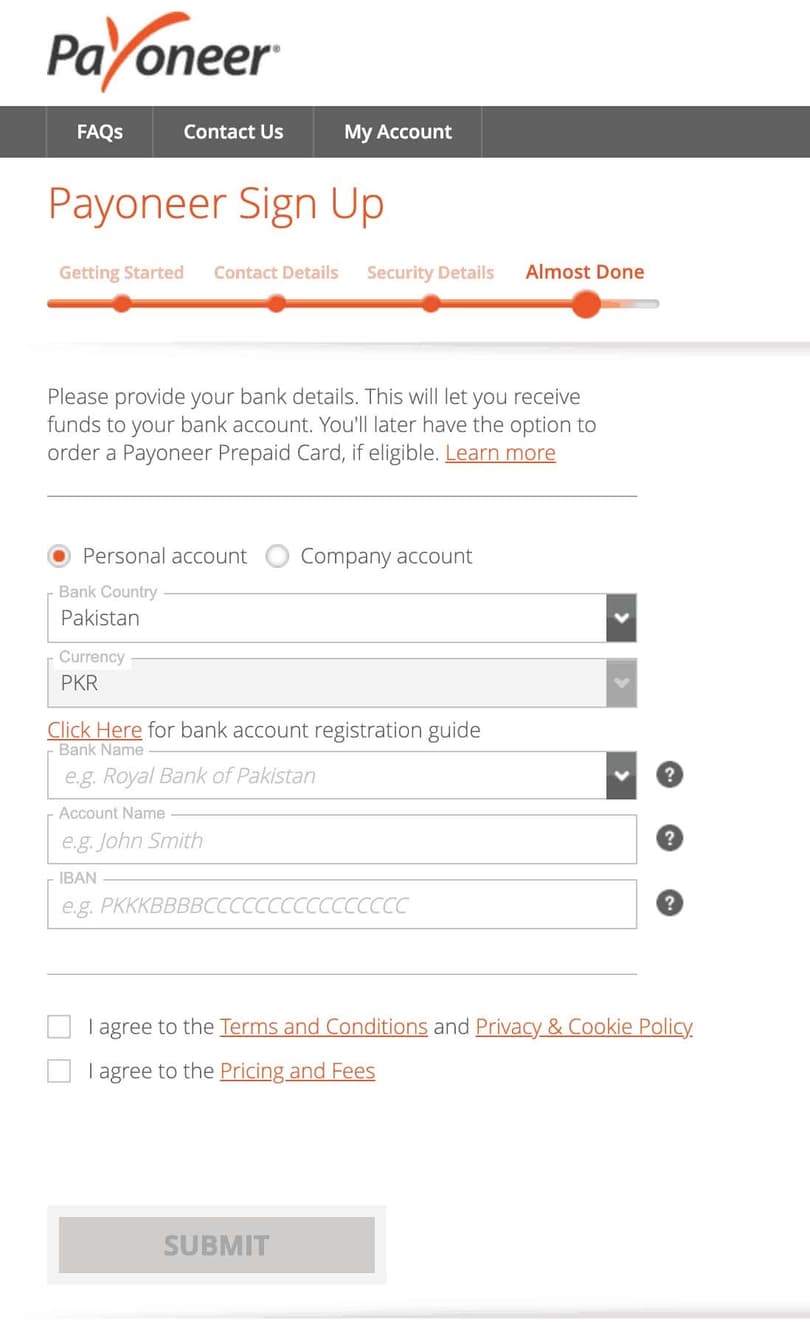
#6 Finishing the sign-up process
Provide your bank details, check the ‘Terms and Conditions’ and ‘Pricing and Fees’ boxes, submit your application, and wait for approval.
Once you complete all the mentioned steps, you’ll get a verification email with an activation link. It will indicate that your Payoneer sign-up process has almost been finished. Getting another email confirmation letter will mean that your account has been approved and is ready to receive payments.
Conclusion
To boil it all down, here is what you need to do to start your journey with Payoneer:
- Go to Payoneer’s main page and click Register.
- Select the pertinent business option.
- Begin a sign-up process by choosing your business type and filling out all the fields.
- Provide relevant contact details.
- Set the username, password, and other security details.
- Provide your bank details and agree to all terms.
Payoneer has been on the market for many years and lived up to its name, proving its reliability year by year. The company stands out in various aspects, however its most distinctive features are global reach, flexible withdrawals, and efficient invoicing.
Now that you know how to create a Payoneer account, all that’s left is to find customers and start fruitful cooperation. Lucky for us, that’s totally on you. Good luck anyway!
FAQ
Is Payoneer available in my country?
Payoneer is an online payment platform that is widely used in many countries across the globe, including but not limited to the U.S., U.K., France, Germany, Spain, Italy, Japan, Canada, Australia, Brazil, Argentina, Norway, China, and India. However, some services and features provided can vary depending on your location.
What information and documents are required to create a Payoneer account?
A Payoneer sign up process consists of several steps, during which you need to provide personal details such as personal and contact information, a valid government-issued identification document (ID, driver’s license etc.), tax-related information, bank and business details.
How long does it take to approve a Payoneer account?
Usually, it takes a few business days to approve a Payoneer account. However, the process might take longer due to several factors, such as the accuracy of the information and documents provided, or if there are specific verification issues.
How long does it take to get money wired from Payoneer to a local bank?
Withdrawing money to a local bank typically takes between 2–5 business days. But you can speed up the process; if possible, use your local bank mobile app to wire money once you create a Payoneer account. This way, your funds can fall into your bank within minutes!
What’s a Payoneer Prepaid Card?
The Payoneer Prepaid Card is a physical card that provides secure and expedient online purchases while retaining the ability to access funds from ATMs. The card is completely optional, but if you wonder how to sign up for a Payoneer Prepaid Card, this guide will be of use.


