How to Set Up Apple Pay

Contactless payments have become a part of our lives and a classic way of shopping, which is no less popular than bank cards or cash. It’s fast, convenient, reliable, and safe.
The Apple Wallet essentially digitizes debit and credit cards, providing a simple payment method for owners of iOS devices. Whether you shop in iOS apps, on the web, or in real life, paying with Apple Pay is easier and faster. This payment method wins in many ways, but first, you must set it up on your device.
So, how to set up an Apple Wallet on an iPhone? Keep reading for a comprehensive guide on Apple Pay settings for all your devices. By the end of this article, you’ll know everything about Apple Pay set up on your iPhone, Apple Watch, iPad, or MacBook in just a few simple steps.
How to Set Up Apple Pay on iPhone
First and foremost, you should set up Apple Pay on your iPhone, and then you can move on to the rest of the devices.
So, here are our step-by-step instructions on how to add a card to Wallet and set up Apple Pay on iPhone.
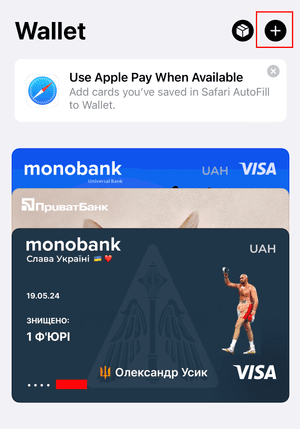
- Seek out and open the Apple Wallet app on your device.
Tap the “+” button in the upper right corner.
If prompted, sign in with your Apple ID and click “Next.”
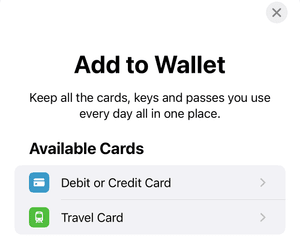
Select the card type and the appropriate option: new (credit or debit), previous, or the one from a supported application.
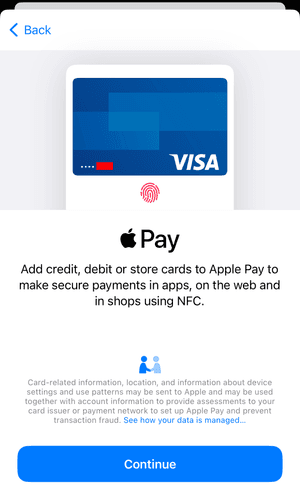


How to set up Apple Wallet on iPhone? To add a new card, you must select the “Debit or Credit Card” option and click “Continue.” Then, you can either scan your physical bank card details using your iPhone camera or enter them manually. Whichever method you choose, after that, you must enter the card’s expiration date and CVV code found on the back. Once you agree to the terms, you must contact your card issuer or bank to validate it. After your request is approved, you must enter the activation code you received and click the “Next” button. The last thing you need to do is indicate whether you want to use it as the default or not. That’s it, now the card has been added to your iPhone Wallet, and you can use it to pay for purchases using Apple Pay.
To add a previously used card to the Wallet app on iPhone, you must find the “Previous Cards” option and select any cards from the list that you have used in Apple Pay previously. Next, click the “Continue” button, log in with Face ID or Touch ID, and follow further instructions on the device.
If you want to use a card from a supported app, select your bank or card issuer’s app in the “From Apps on Your iPhone” option. Then, follow the on-screen steps to add it to your Wallet.
Furthermore, you can also consider other options—in Apple Pay on your iPhone, you can add transport cards, driver’s licenses, IDs, and so on.
How to Set Up Apple Pay on Apple Watch
Apple Watch is considered one of the most convenient devices for contactless payment for purchases. Upon adding a card to Apple Pay on your iPhone, you will be beckoned to extend its power to your watch. However, if you haven’t clicked “Add Now,” you can do this manually later.
- Open the Watch app on your iPhone that your Apple Watch is connected to.
- Go to “My Watch” and tap “Wallet & Apple Pay.”
- To add the card that has already been added to your iPhone, find the “Other Cards on Your Phone” option and click “Add” next to the desired card among the available ones. All you need to do is enter your CVV.
- To add a new card, simply click “Add Card.” Follow the on-screen instructions and, if required, authenticate the process with your bank or card issuer.
- Now, you’re ready to use Apple Pay on your smartwatch.
How to Set Up Apple Wallet on iPad
The tablet provides an excellent way to pay for online purchases, and the installation process on the iPad is similar to the setup process on the iPhone.
- Open “Settings” on your iPad and select “Wallet & Apple Pay.”
- Click the “Add Card” and “Continue” button.
- Now, similar to the instructions for the iPhone, add a new card or a previously used one.
- After confirming the card using one of the available methods (email, text message, or phone call), you can use Apple Pay on your iPad.
Setting Up Apple Wallet on MacBook
Your Mac is another great and convenient way to purchase items online using Apple Pay, and it’s especially useful to add a card on models with Touch ID.
- Go to “System Settings” (or “System Preferences”).
- Select the “Wallet and Apple Pay” section.
- Сlick “Add Card” and follow the steps to connect Apple Pay to your Mac.
- Sign in with your Apple ID and enter your card information, or select one that’s already registered with your Apple system from the list of available cards.
- Now, your Apple Pay on Mac is ready to use.
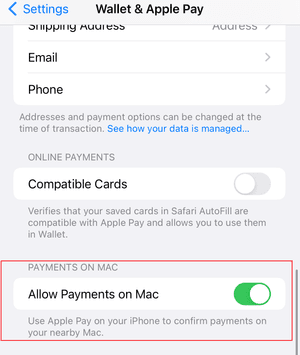
Even without Touch ID, your Mac can still wield the power of Apple Pay for all your purchases. To do this, you need to find the “Wallet and Apple Pay” option in your iPhone settings or Watch app and select “Allow payments on Mac.” Then, to make purchases in online stores with your Mac, you simply need to confirm the payment using your phone or smartwatch.
Customize Apple Pay Settings on iPhone
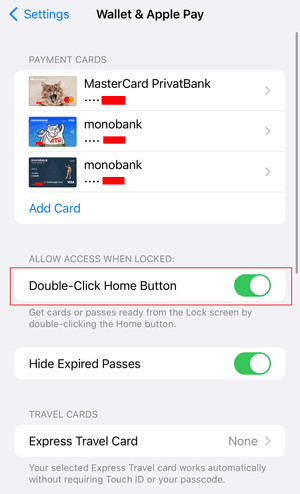
Once you’ve added bank cards to Wallet and completed the Apple Pay setup process, you can customize some settings to improve your Wallet experience and make contactless payments even more convenient. So, in the Apple Wallet settings, you can do the following for your convenience:
Enable or disable double-clicking the side button to display all available cards;
Enable or disable Apple Pay in Safari autofill;
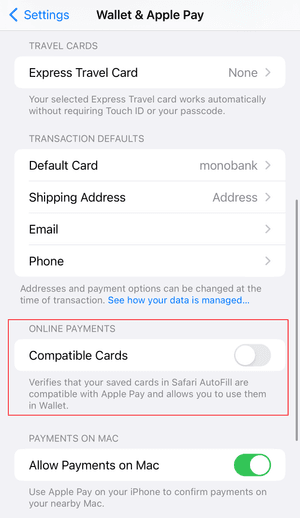
Allow your mobile device to approve payments on MacBook;
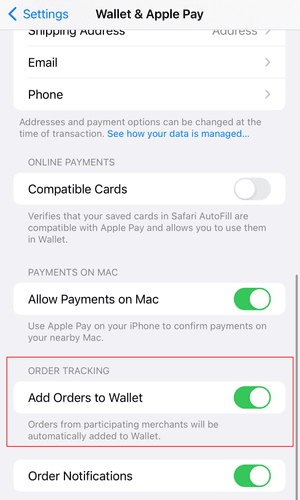
Add your active orders to the Wallet application.


Please note that the first payment card added to your Wallet is used as the default card. If you want to change your default card, you must go to your Wallet, select and hold the card you want to set as primary and drag it to the very top, placing it in front of all other cards.


